Installation Tips for a Solar Water Heater
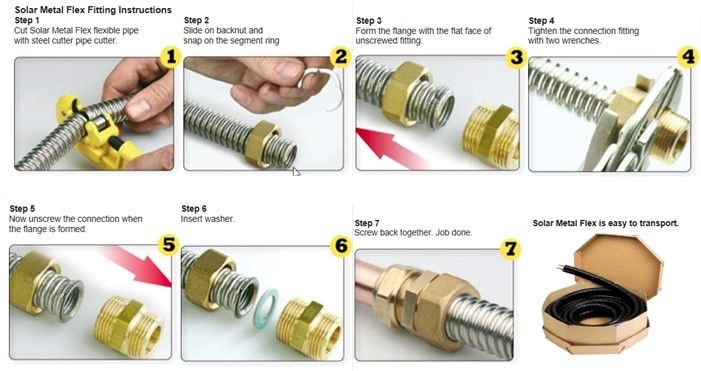
Our DIY pre-engineered solar water heaters are designed to be installed by the home owner without any prior knowledge of solar water heating. The pre-packaged systems will arrive with every component you will need for your project including the heating fluid and a special positive displacement drill pump to fill and pressurize your system. A detailed installation manual covers the installation completely and we offer excellent customer support to help you with your project. In some cases if the collectors are being mounted on a roof, a home owner without roof experience might want to hire a roofer to perform this task. However the rest of our system can be done by just about any home owner with minimal tools.
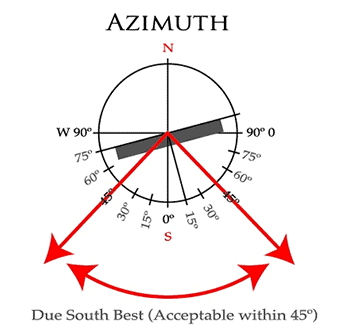
When installing your solar water heater you will first need to locate the position of the collectors. This ultimately will determine the overall performance of your system. The most important aspect is to select a location that maximizes the southern exposure with minimal shading. A south roof in the winter may be ideal however if it is shaded by foliage from large trees in the summer, this will reduce the performance in the summer. Don’t worry too much if your location is not exactly south as the vacuum tubes will perform very well anywhere between SW-SE.
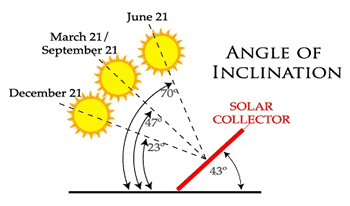
Next you will need to determine the mounting angle of the project. The rule of thumb for maximum performance is the angle that matches the latitude of the project. So if your latitude is 30 N, then you would want to have a tilt angel of 30 degree. However if you are doing seasonal heating such as solar pool heating in the summer or solar space heating in the winter you will want to adjust the angle +/-15 degrees. A pool heater will have the best performance in the summer at 15 degree angle (latitude 30), and for space heating 45 degrees would be optimal.
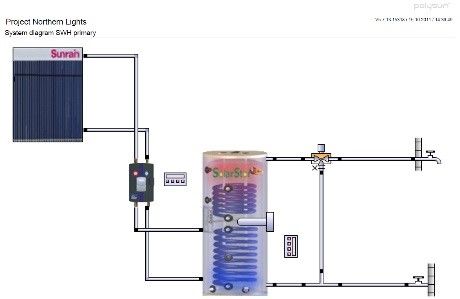
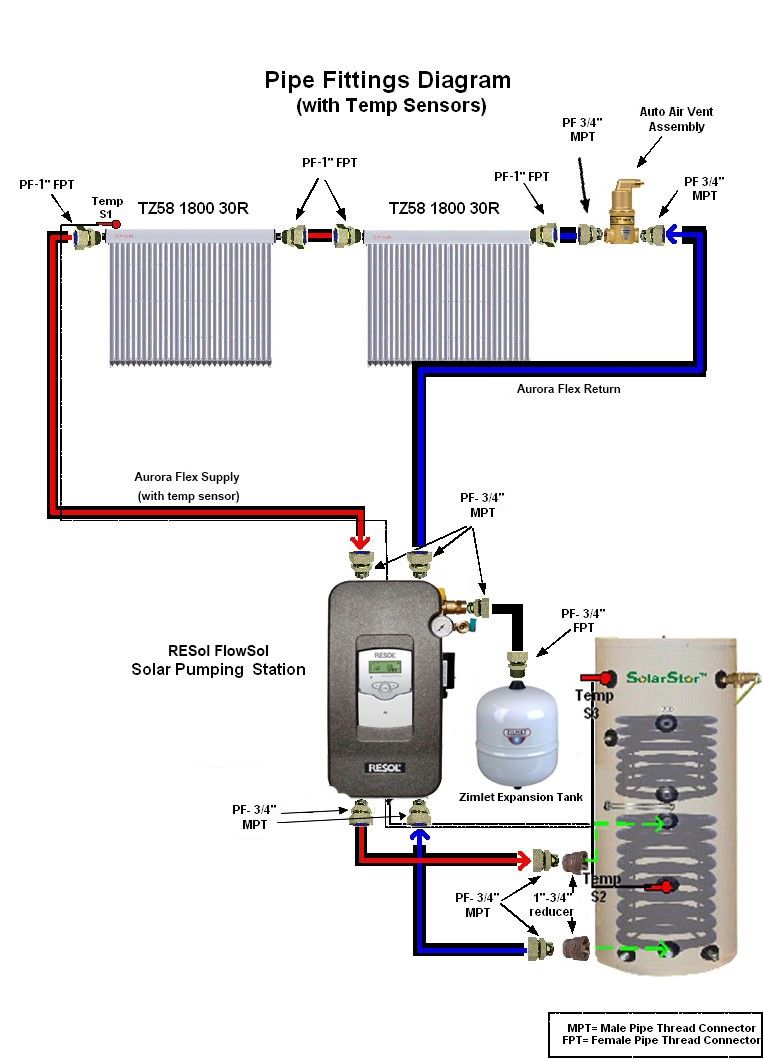
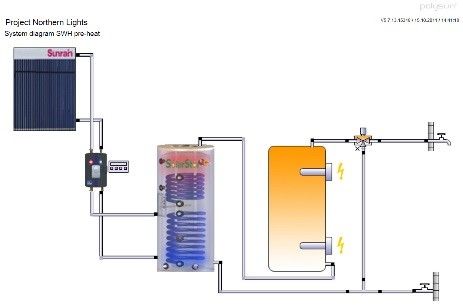
When choosing a design for solar water heater, you have the option to install as a pre-heat system or a supplemental system. All our water tanks come equipped with an internal 4.5 Kw heating element that the home owner can choose to activate or not. In a pre-heat system the solar water tank would only be for storage and no element would be used. The heat exchanger in the bottom of the tank heats the water in the tank. The solar tank is then added in series with the existing hot water tank. In this way when the home owner uses hot water it is primary tank is always being replaced by warm solar heated water.
In a supplemental system the home owner uses the solar tank as the primary heating source and uses the electric element to supplement the solar heat always ensuring the home owner has hot water even during the evening. A supplemental system is great for new home construction, limited space, and when replacing an old water heater. The supplemental solar water heater only use one tank so this saves on installation costs.
Pre Heat
Supplemental
