Horizontal Ground Loop Geothermal Kit Installation Videos
Installing the ground loop
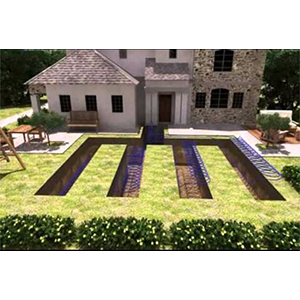
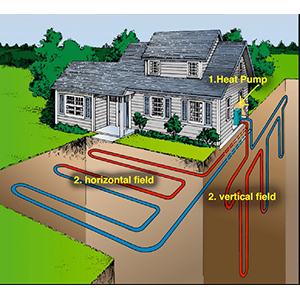
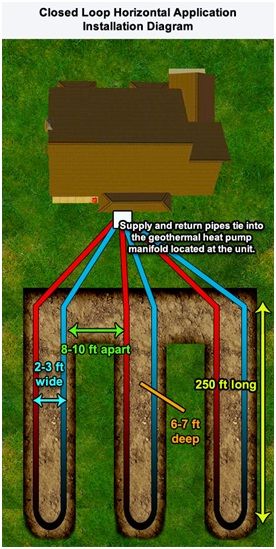
For DIY system we recommend horizontal ground loops as the easiest method of installation. All that will be needed is to hire a back hoe with a 36” bucket for a slinky loop or alternatively a chain trencher can be rented to provide single line trenches for the loops. In Canada and Northern USA we supply 800 feet coils per loop. In Southern Climates you can often get away with 600 feet of piping.
Vertical loops can also be done but you will need to hire a drilling company to create the bore holes needed. Open loop or well loop are also very easy for DIY and can be very cost effective as well as provide the best performance. If you live on a lake a lake loop may also be possible but you more municipalities are banning lake loops as they could potentially be hazardous to the environment should a pipe crack or develop a leak. Call us to discuss this other option for installation.
The sizing for a geothermal unit is one loop per ton. However when in doubt you can always go bigger. The more contact the geothermal lines have with the earth the better the heat transfer will be. We use 1” high density Poly-Ethylene piping. This larger diameter means more surface area of contact and better heat transfer.
To start you should map out your property measuring the distances of each trench. Remember to take into consideration the extra supply and return piping you will need to make the connection in the house. NEVER splice a loop! If you want larger loops then we can supply you with 1000 ft piping roles.
You should always consult your utility companies to ensure you know where any buried electrical, gas, and water lines are located. Once you have this marked out you should then hire an experienced backhoe operator to dig your trenches. 6 feet is minimum distance to ensure you are below the frost line. In some northern areas you should go 8 feet to ensure you are well below the frost line. A back hoe operator in your area will be familiar with the frost levels in your geographic region and can advice.
Once you have your trenches dug, it is recommended that you line the bottom with 6” of sand before you lay down your piping. This will aid in the heat transfer making sure there are not air voids around the piping. The sand will also protect the piping from any sharp rocks that may be in your trench and could possibly damage or puncture the lines. Once done you should back fill the trenches with a further 6”-12” of sand. Wetting the sand will ensure that the sand fills tightly around the Poly-Ethylene piping. Finally you can now back fill your loops with the remaining clay and soil you had removed, ensure the ground is fully compacted to remove air voids.
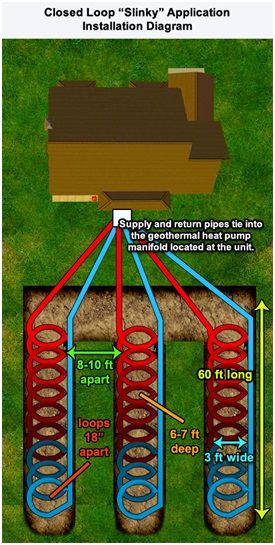
Creating a slinky loop with Solar Thermal Assist
This is a great way to use solar thermal to aid a geothermal loop to help heat the ground increasing the performance.
Creating a Slinky Loop Tips and Tricks
This video shows some extra tricks to making a slinky loop.
Installing furnace
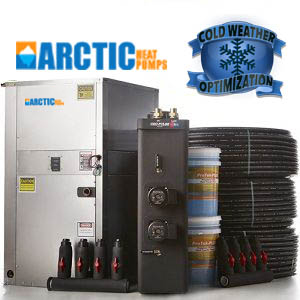
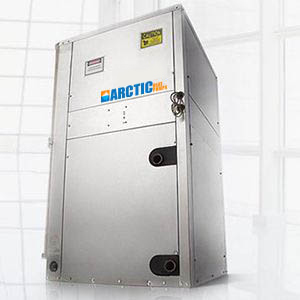
The furnace installation should be relatively easy if you are replacing and existing furnace. Be sure to order the correct suction side either right or left. We also offer vertical geothermal furnaces that are hung to the floor joist and found in tight spaces such as a crawl space. Having a larger amount of air flow is important with a geothermal furnace. In some cases, this may mean you need to expand the sizing of your current trunk lines to allow more air flow. The air flow ratings of each heat pump are different so read the manufacture suggestion.
The furnace will need a dedicated power supply to run the electronics as well as the ECM fan motor. This connection should be done by and electrical contractor and follow the local building codes. At this time you may want to also install an electrical back up heating element that will be placed in the supply duct to provide a second heating source should the geothermal heat pump fail.
The furnace and or duct work may need to be adjusted to accommodate the new heat pump as they most likely will not be the exact same size. When mounting the furnace, we recommend a vibration pad be installed on the floor as well as a vibration isolation boot be installed between the connection of the furnace and the supply line. This will ensure that the compressor vibration is isolated to the heat pump giving you a whisper quiet system.
Unlike most other heat pump manufactures, connection to the home thermostat is done through a standard Heat Pump thermostat that can be purchased anywhere. Most other companies have a proprietary system that can only use their temperature controller.
Flow Center
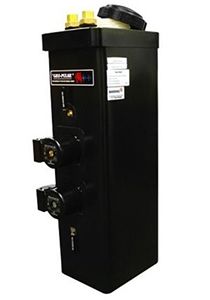
Unlike geothermal systems of the past our closed loop system actually are open loop non pressurized. This makes installation much simpler. The pump station will automatically remove the air from the piping and makes commissioning a system so much easier. A geothermal flow center has a large insulated reservoir that simply pumps the fluid through the loops and back. Any air in the loops is returned to the fill reservoir and released out of the system. The other major advantage of a flow center is that there is very little pressure in the system to cause leakages. Only what the pump produces. Because it technically is not a closed loop, there is no need for an expansion tank.
The flow center saves hours of time in the installation as the pumps are completely contained in the system. Depending on the number of loops there will be either on or two pumps.
How to commission and Use and the Fill Station


